
Meta Business Suite
How to give access to Meta Business Suite: add people and assign assets
When you work with an agency, a freelancer or a new team member, they need access to your Facebook Page, Instagram account or ad account. The safe way to do this is through your Meta business portfolio, so you never share your personal login and you can remove access at any time.
Here is the full process in six steps, with a screenshot for each one.
Step 1: log in to Meta Business Suite and open Settings
- Open your web browser and go to business.facebook.com.
- Log in with your usual Facebook or Meta credentials.
- In the bottom left corner, click the gear icon and select Settings from the sidebar menu.
OR, open business.facebook.com/latest/settings directly. That takes you straight to Business Settings, so you can skip ahead to Step 2.
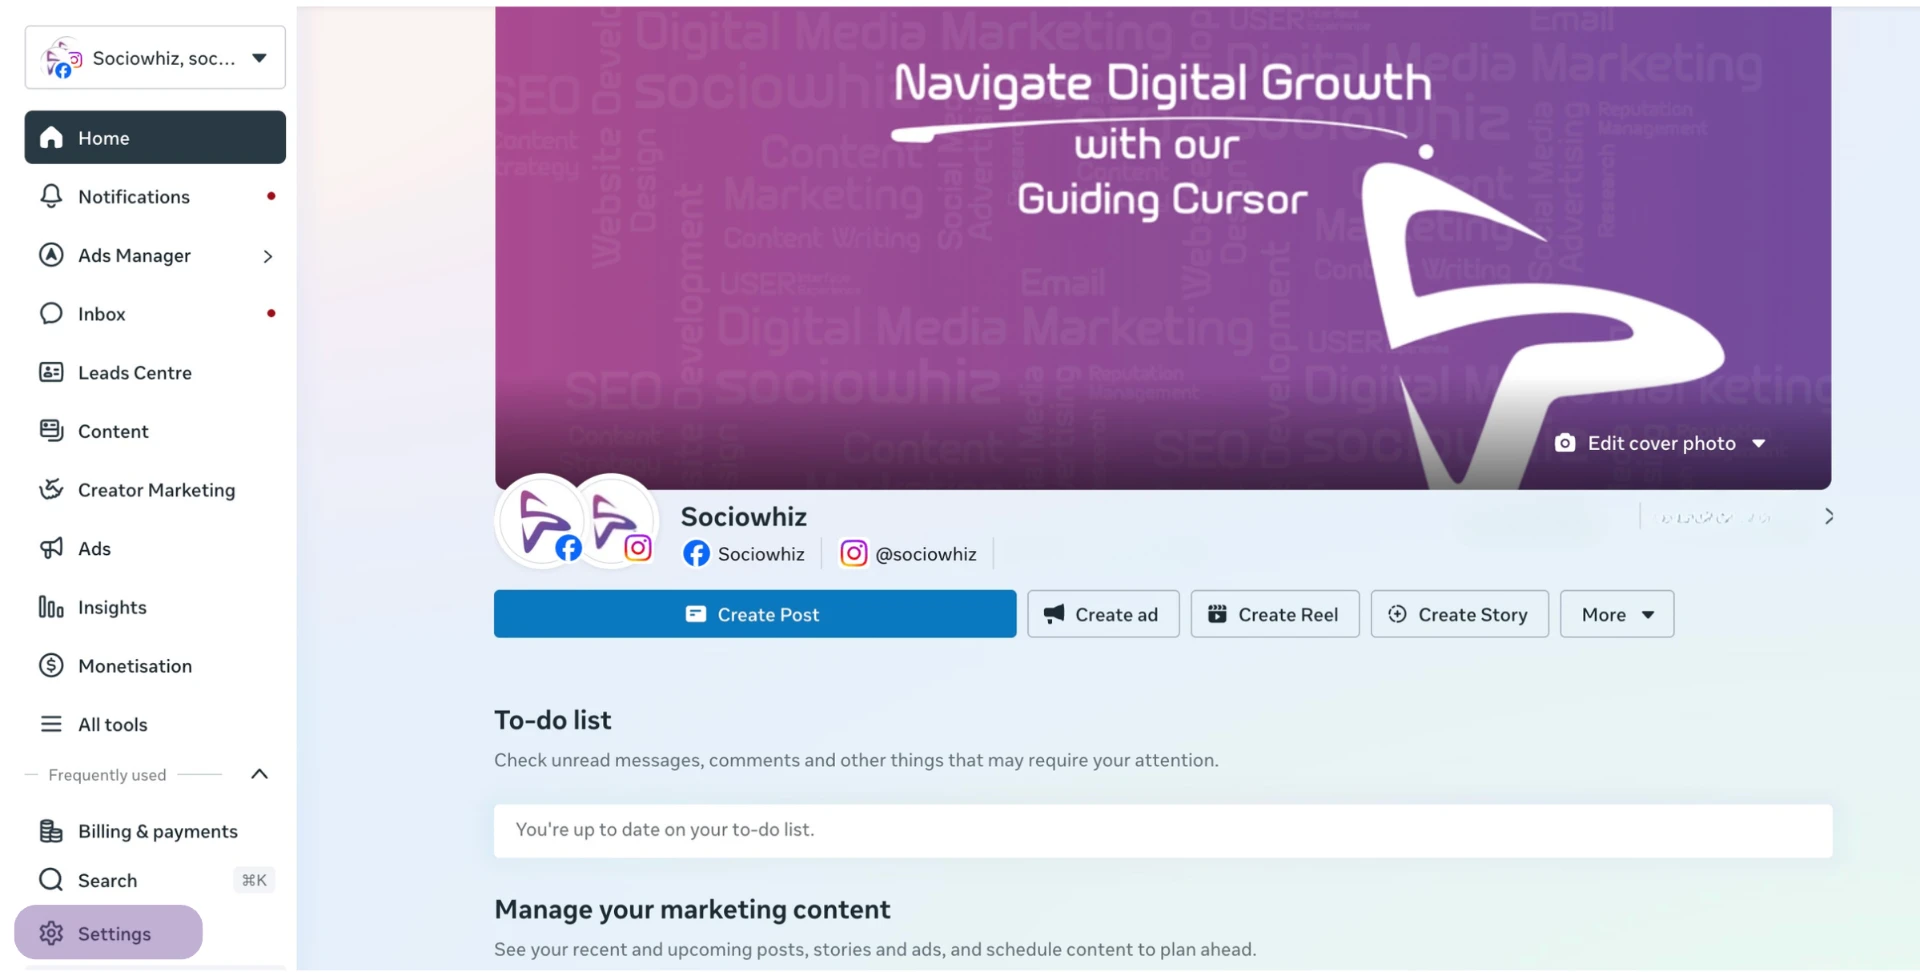
Step 2: click People, then Invite people
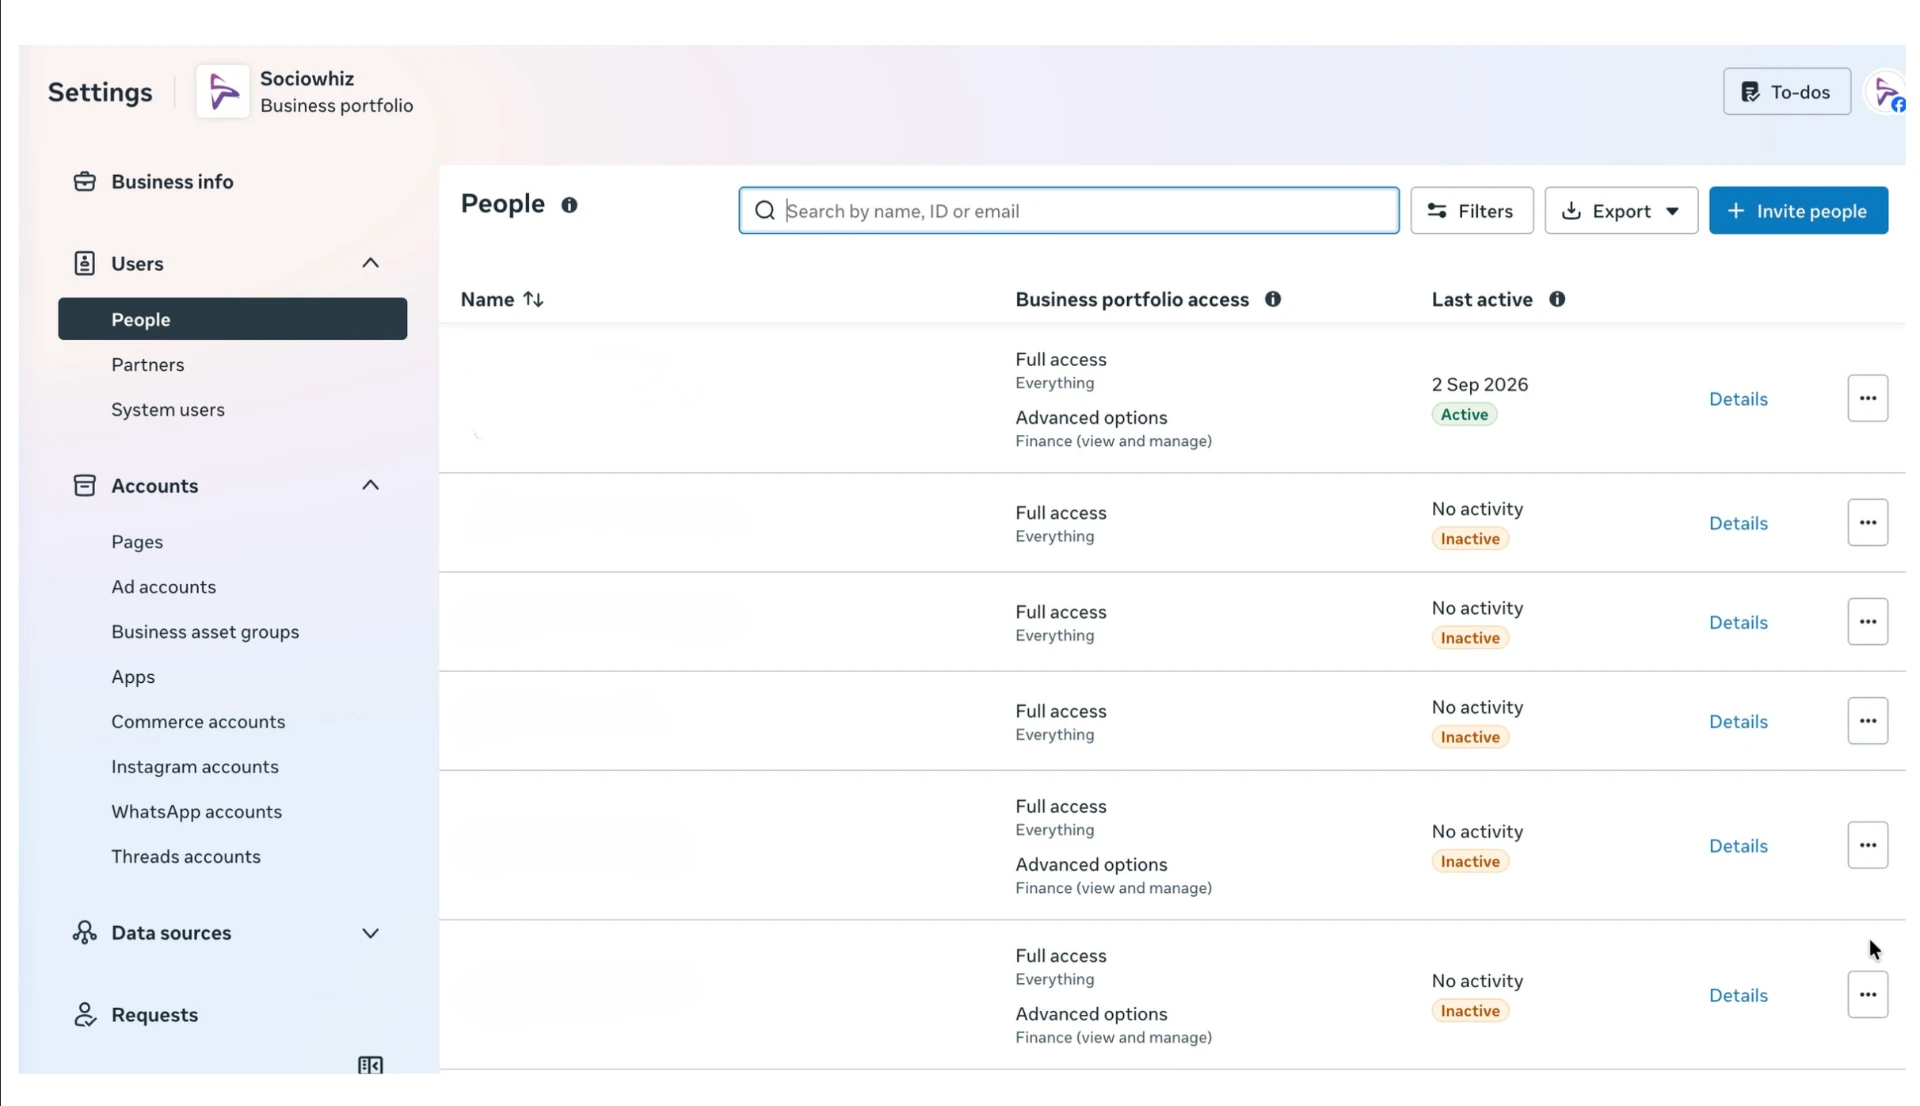
In the left sidebar of Business Settings, click People. This section lists everyone and every partner with access to your business portfolio. Then click the blue Invite people button.
Step 3: enter the email address and click Next
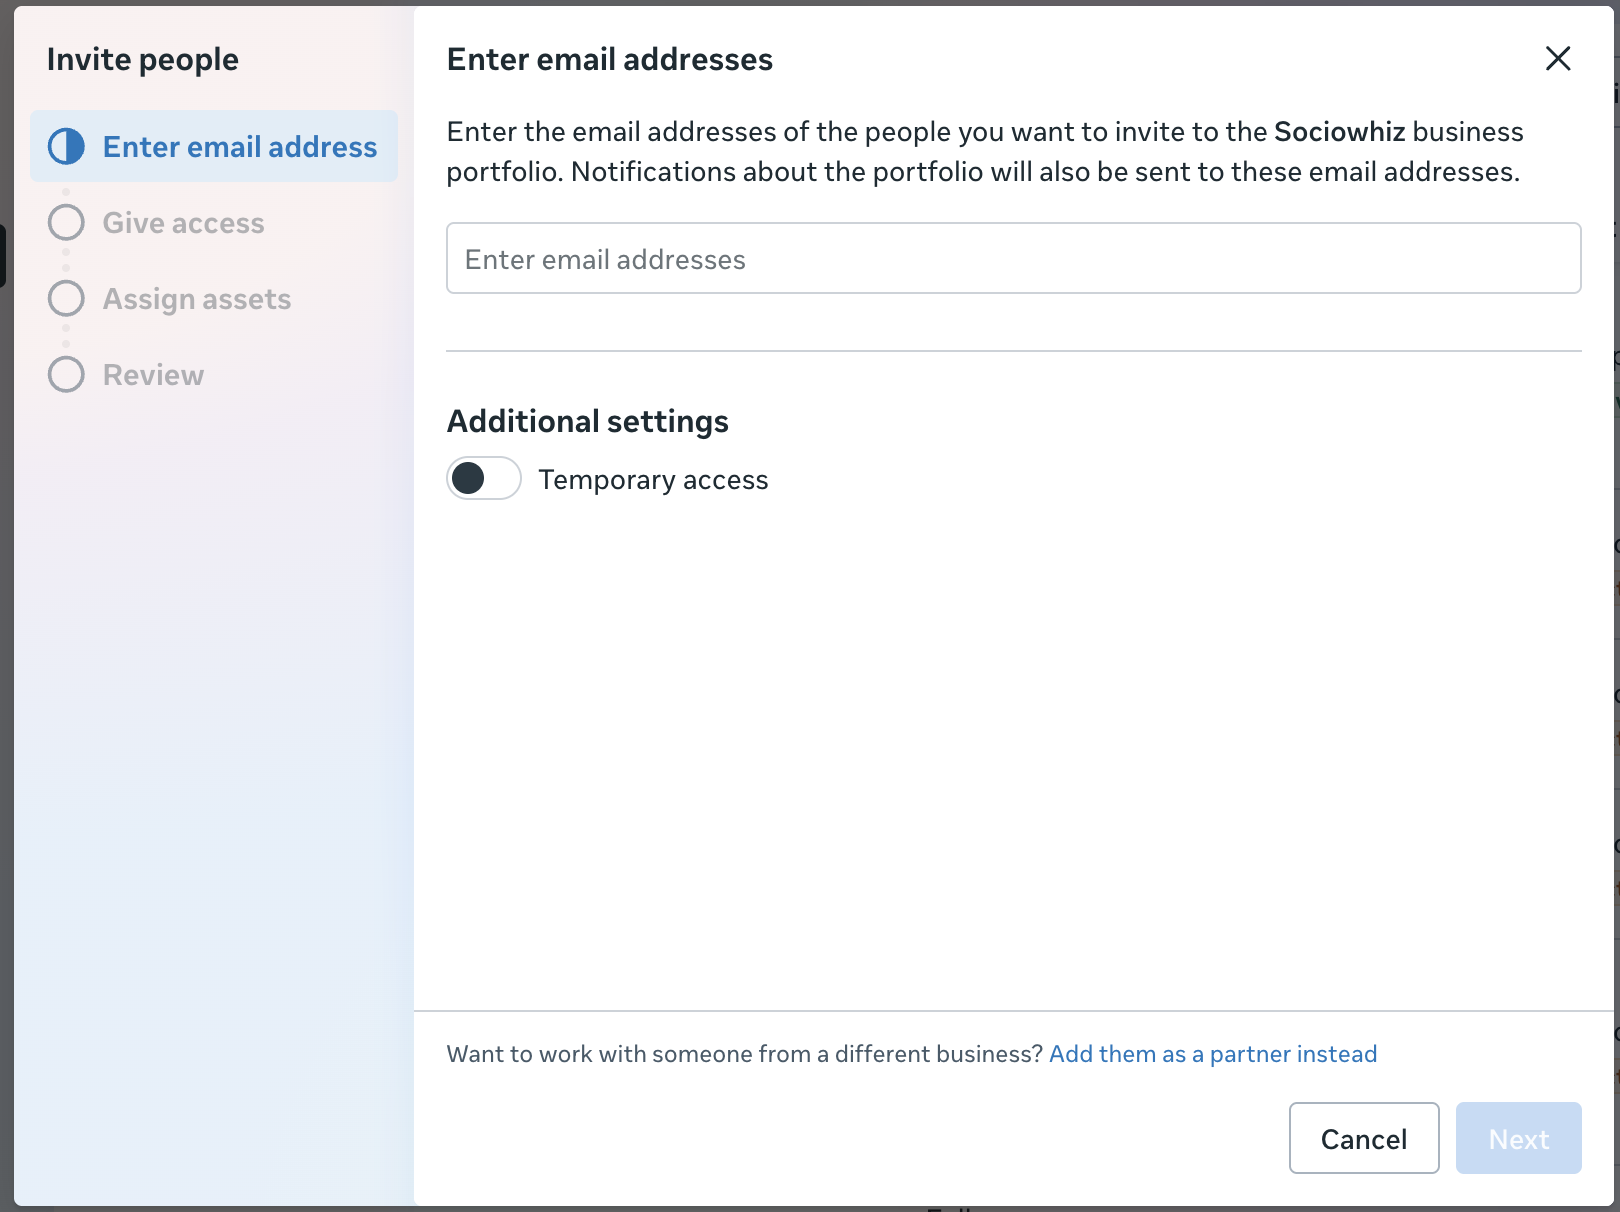
Type the email address of the person you want to give access to, then click Next. The Next button stays greyed out until a valid email address is entered. On the left you will see the four stages of the invite: enter email address, give access, assign assets and review.
Step 4: turn on Full access and Advanced options
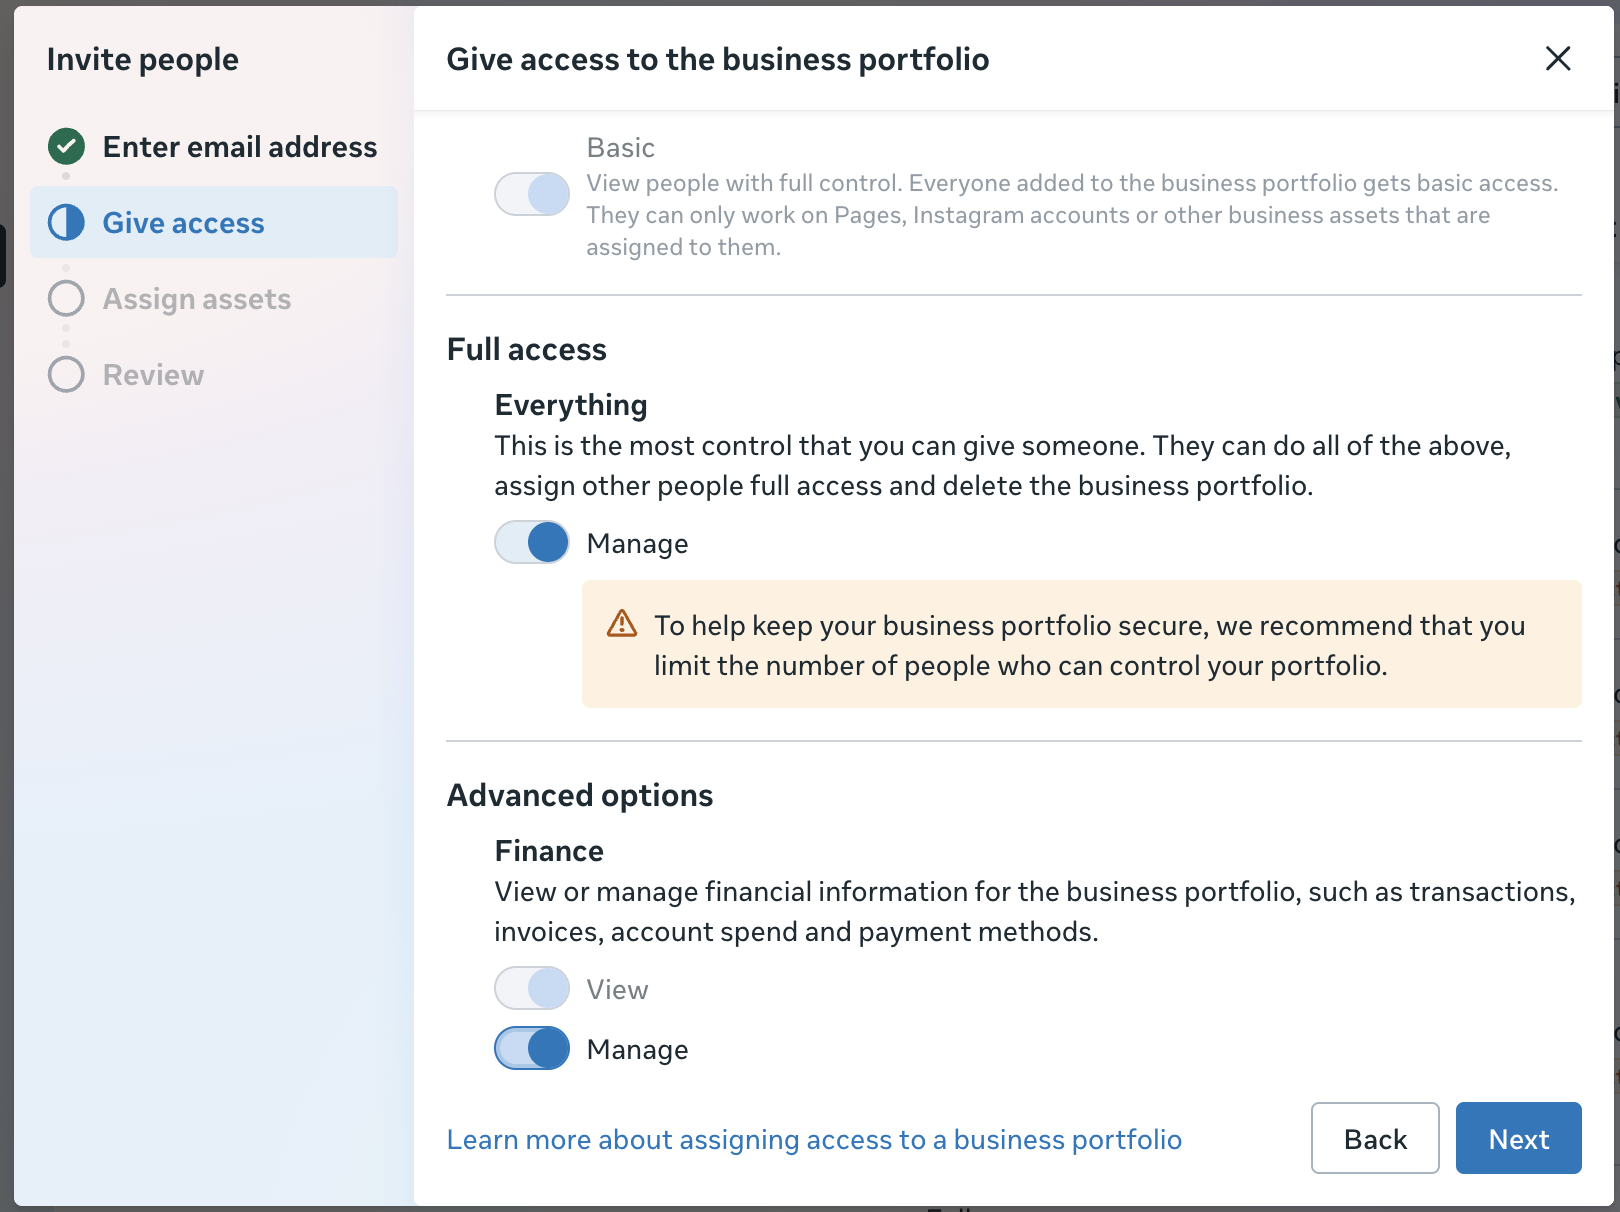
On the Give access screen, switch on Full access so the person can manage the portfolio. Then open Advanced options and turn on the permissions they need, such as Finance (view and manage) if they will handle billing for ad campaigns.
Meta recommends limiting how many people have full control of a portfolio. Only give full access to people you trust, like your agency or a business partner. Everyone else can get partial access.
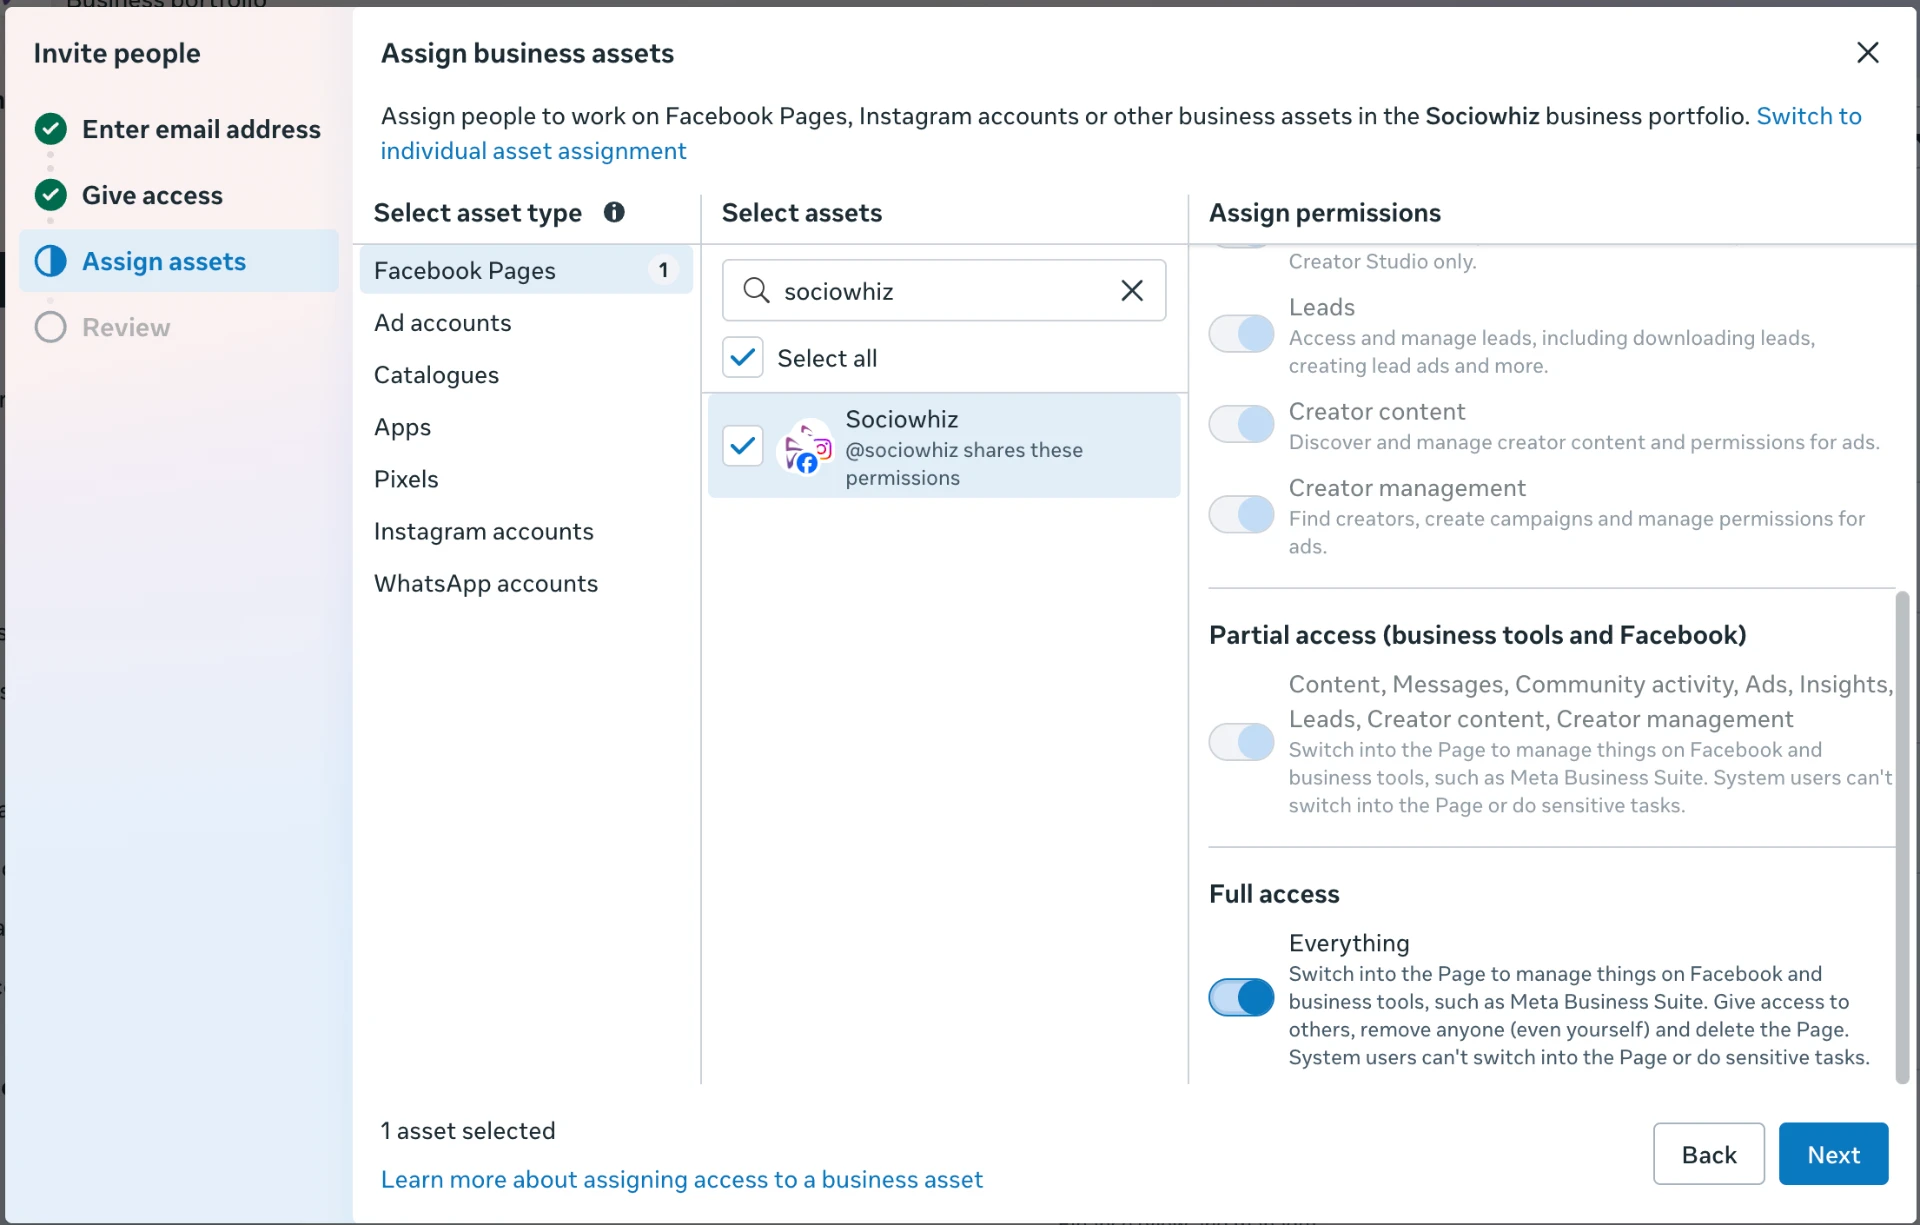
Step 5: assign assets and set permissions
Now choose which business assets the person can work on. Pick an asset type from the left column, such as Facebook Pages, select the assets you want to share, then set the permissions on the right. For full control, switch on Full access, Everything. You can give partial access instead if that suits the role better.
Repeat this for every asset type the person needs: Ad accounts, Instagram accounts, Catalogues, Pixels, WhatsApp accounts and so on. The screenshot shows a Facebook Page, and the other asset types work the same way.
Step 6: review the permissions and click Invite
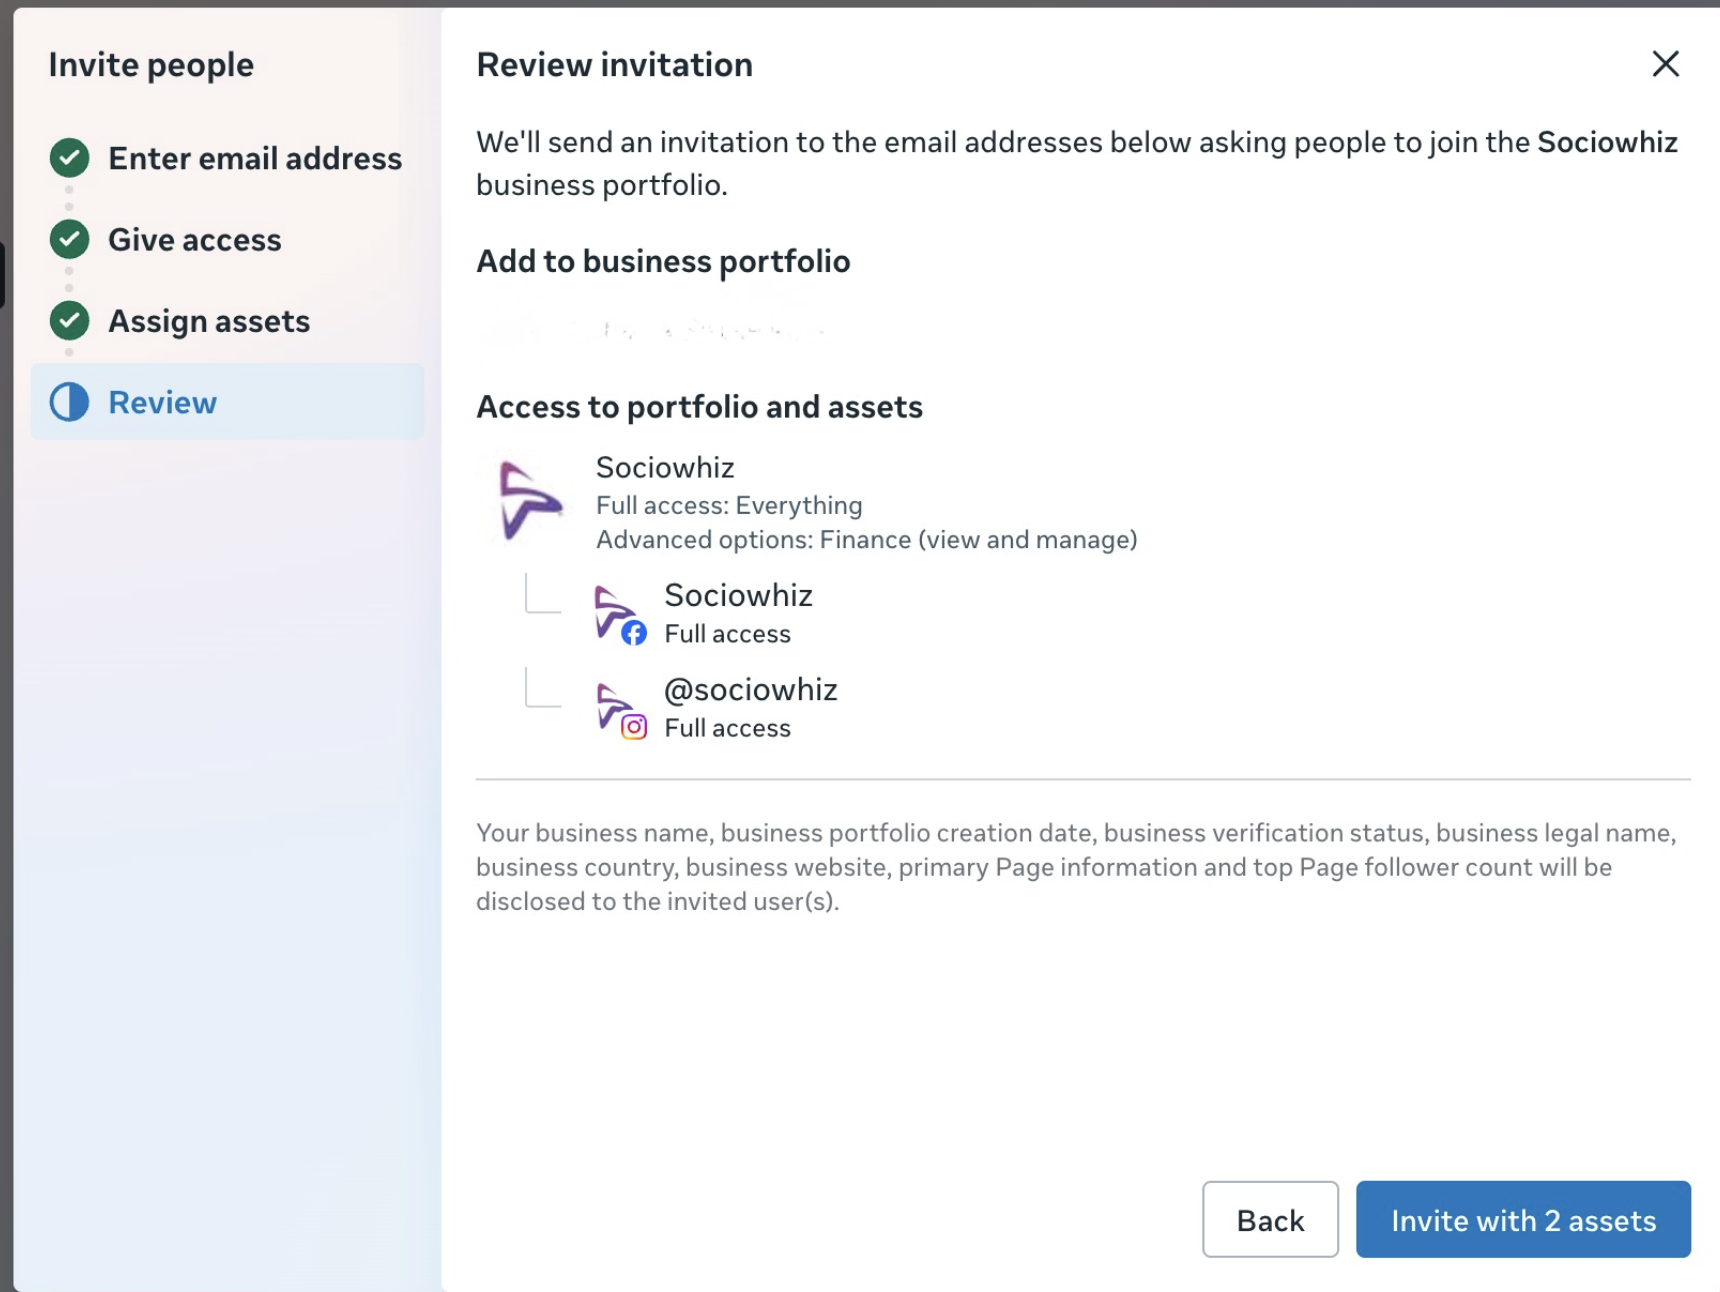
The Review invitation screen sums up everything you have chosen: portfolio access, any advanced permissions and each asset with its access level. Check it carefully, then click Invite.
The person receives an invitation email. Once they accept it, they can access the assets with exactly the permissions you set. Until then, the invite shows as pending under People.
Good habits for managing access
- Give each person their own invite instead of sharing one login.
- Keep full access for a small number of trusted people.
- Review the People list every few months and remove anyone who no longer needs access.
- If an invite expires or goes to the wrong address, cancel it and send a new one.
Working with Sociowhiz on social media or ads? Send us an invite using these steps and we will take it from there. Questions along the way? Just reach out to us, we are happy to help.
TLDR
Settings, People, Invite people, email, Full access, assign assets, review, Invite. Your teammate gets an email and you stay in control.